Saturday, November 2, 2024

Having feelings


I have some feelings about these cups. 
      • I feel annoyed by the glaze. It's not what I wanted. I was trying some things and none of them worked.
      • I feel thrilled with the way they feel in my hand. They are light and comfy and the shape is really lovely.
      • I feel grumpy about the handles. I succumbed to peer pressure and tried to pull handles. It's not my normal handle and the fact that I never pull handles really, really shows. 
      • I feel like making more of these. As much as I'm dissatisfied by the way they look, I'm learning things about where I want to take this shape next.
      • I feel weird about bullet pointing my feelings but here we are.
Moving on to the things I just got from a wood fire kiln I was allowed to put a few pieces into.

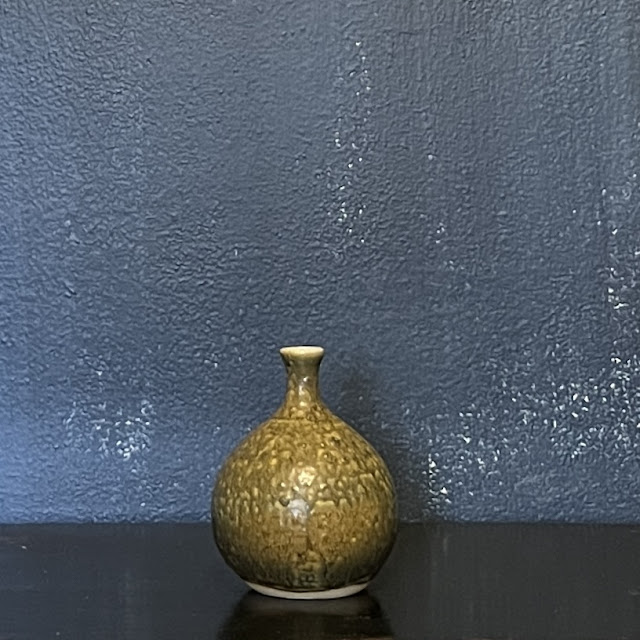
Here's my drama queen:


I love it so much! The texture, the toastiness of the raw clay, the little dots in the glaze.

Just YUM! 


I put the wadding on the side which warped the heck out of it. But that's cool. What's not cool is that it leaks! Just a little bit but that's all it takes. Such a drama queen!


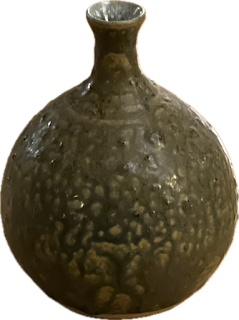
This one leaks too. That's fine with me. I expected it to leak. I made it on a balloon, which was kind of precarious. The glaze bubbled up in a weird way inside. I would prefer the outside looked like this EXCEPT for the fact that the outside looks like this:


Which is lovely and varied and organic. So lovely. I used shino glaze on all the pieces and regret nothing.


This one is fine. It's fine. Whatever. It's what it is. I do love the raw clay and I really enjoy making the messy overlapping wee slabs of clay. It feels like patchwork and I do love me some patchwork. It's an odd shape - I used the bottom of a quart mason jar. I've done it before and honestly, I like the other one way more. I'll share a picture another day. That one is being used as a planter in my office cubical. This one doesn't know what it is.


These know what they are. They are mugs. They are magnificent. They are so gorgeous that the camera can't catch how delightfully metallic the glaze looks. I only lined it and used a titch of glaze around the rim. The rest is all from the wood fire.


Here's the whole wood fire gang. They are buddies...I assume. 


They haven't said otherwise.

Thursday, October 24, 2024

Too Many Teapots?

No such thing! 

I really enjoyed my Teapot Class that I took at the Midwest Clay Project in Madison WI and I learned a ton!

Green teapot

This was my first attempt. The body warped slightly so the lid is not a great fit and the pot weighs a ton! Otherwise, pretty perfect. I love the kooky looking spout, she's generous! The glaze really classes it up. 

As I made this, I pictured her as a flawed but perfect grandma: She's big and soft, wears floral house dresses and slippers during the day and smells like cigarettes, but she lets you watch Cartoon Network all day and she always has those individual cups of vanilla fudge ripple ice cream that come with little wooden spoons that she bought just for you and you just know she loves you fiercely so she's all good. 

(PS - neither of my grandmother were like this, I think they'd want you to know that).


Small turquoise teapot

Don't tell the others, but I think this one is my favorite. The lid doesn't fit well but I LOVE the glazes and I think it's a stylish pot. Although I don't have a story for this one...sorry. My brain tends to come up with stories when I'm doing something with my hands but it can't be counted on.


Bulbous Pink Teapot

Here's pot three.  Do you recognize her? It's Mrs. Potts. from Beauty and the Beast! That is, it's Mrs. Potts if you haven't looked at a picture of her in decades. I just realized that when I went looking for a link for reference. I didn't make her on purpose, it just happened (I think it's the hat, er, lid) so I glazed her in pink. I actually don't really like the way the glaze worked, it's kinda whiter where it's thin. I wanted a more solid pink, like how you know who looks in my imagination.


Turquoise teapot with odd lid
 
I made this one just to try out this ginger jar lid. It's...fine. I like the glaze but I made it look weird around the opening. I'm not going to show you, you'll just have to take my word for it.


Animal shaped vase teapot

This is the last one. Don't you love it? You love it! I love it! 
It's a rat-ephant in a beret!
The story: He's always wanted to go to France; he never has but pretends that he has. It's OBVIOUS but no one ever calls him on it. He's a little insecure and quite vulnerable, you can't help but feel for him.


Animal shaped teapot from another angle

But so frickin' cute! I used extra spouts that I made just on case for his front legs. I was originally going to give him a regular tea pot foot but once I put those ears on him, he came to life.
This was my inspiration, believe it or not. He took a turn.


Top 3 listed teapots, pointed towards the camera, with slightly warped spouts

One last piece of trivia, which I didn't know. When you made the spouts, they look straight but they have been spun around a lot on the wheel. But after being fired, they can kind of warp in one direction. People with more wheel experience can probably correct for that (I assume). I think it's fun. Some of my spout's issues may be that I put them on a little cockeyed-ly but they look a little like their noses are out of joint.

I learned so much and I will have more pots to share very soon!

Because there's not such things as too many teapots.


Monday, October 21, 2024

More Mugs!

Holy Cats - I love making mugs!


And I'm crazy about this turquoise glaze and the way the naked clay looks on these!


The black lining will hide the coffee stains better. I don't remember what I did to get the brown on there. I never take notes but I do dig it.


Saturday, October 19, 2024

 Last night I stirred up some old indigo vats just to see if they would wake up. 

They had been sitting, I kid you not, for at least a year. 

This is the second iron vat that I've made, let sit for a few days and then gotten no color from. But then, after waiting a year (!), I've found the blue. I don't think this is typical for an iron vat.  

I'm glad I didn't give up on it. 


This is after just a short - less than a minute - dip. Really good color!


This is from the henna vat, not heated up, just stirred. I really love indigo dye. I've been playing with some other dyes too but I think I'll always come back to indigo.


Friday, October 18, 2024

I've been making lots of pottery lately. I recently joined in the @mscrmadison wood fire. I love the way the raw clay got toasted. I’m looking forward to my next chance to experiment. I’d like to change up how I glaze stuff for a wood fire. I think I'll use the glaze more as a liner. I also want to brush something with soda ash water to see what that does. I’ll also make bigger things. I’m sure there's more I can focus on. It’s such a treat to learn new techniques.🔥 


This is my favorite glaze. It's the drippiest and I like the organic-ness of it. 
I think it looks the most like rock.


I do really like how the toastiness looks on the textured surface of the clay, 
but I'm not nuts about the glazed bit.


Awesome one! Great color and toastiness. 
I took it to work to hold my tea strainer, it's the perfect size.


Some butts.


Wadding on the sides for these. I really like the dots they leave


Wadding dots seem wasted on the bottom.


Three wood fired mugs and one mug butt (last photo below). I was surprised at how much these mugs shrank but I love them so much. They are heavily featured in our coffee and tea rotation. 


Thursday, September 12, 2024

Washing and Scouring Instructions


For the things you dyed:

Woohoo! Awesome job dyeing fabric, you!! I hope you had fun.

If it is wool or silk or a delicate fabric, spray it with water with about 10% vinegar in it to restore the pH.

Ideally, you will hang your newly dyed fabric up for at least 48 hours so that it has time to fully oxidize. I know it’s hard to wait that long but it’s worth the wait. 

The first time you wash your indigo dyed fabric, in addition to your regular detergent, add a half a teaspoon or so of Blue Dawn Dish Soap or Synthrapol. Wash it at the highest heat that you feel the fabric can handle. Indigo loves heat. If it’s a delicate fabric, put it in a net bag first.

But wait! What if I batiked it with the gnarly wax recipe you use? How do I get the wax out? 

Good Q. Hang it up for 48 hours if you can stand the wait. Then, I highly recommend you boil that mess out. You’ll need a pot that you won’t use for food ever again. Also, the pot should only be used with indigo as indigo tends to spread. The pot that you buy (hopefully from a thrift shop) can be cheap and awful. Aluminum is fine, enameled stuff is good too. Don’t invest lots of money into it. Also pick up a big metal spoon or set of tongs.

Okey dokey, get the water simmering just below the boil and add some Dawn Blue Dish Soap – about a teaspoon or so – and add the fabric. Agitate and stir it around in there a bit, poke it a bunch of times to help release the wax and then weigh the fabric down at the bottom of the pot or at least so it doesn’t break the surface. Holding the fabric down with the spoon that you stirred with should do it. 

Take the pot off the heat and let it cool. The wax will rise to the surface and solidify. It will take over night – maybe even longer – though luckily for me, I live in Wisconsin. If it’s winter, go ahead and put it outside. Patience is for suckers.

Remove the wax that has solidified at the top of the water and toss it (or save it to use again later*). Take your fabric out and submerge it into cold water. Some wax may appear that is just on the surface of the fabric. You can just brush those things off. Rinse with hot water. If there is still wax on it, repeat the whole process but you should be able to get the wax off after one time. It’ll depend on how much wax you used and how much fabric you boil at once. It’s best not to crowd your fabric.

*If you decide to reuse your wax, put it on some newsprint or paper towels until it is dry. Never add water to your wax, especially when it’s hot.

You should still wash it following the washing instructions above.

Enjoy your works of art!


If you have bought something that I dyed, it has already gone through the above process. Here’s how to wash it from now on:

If it’s a sturdy thing – like a napkin or dish towel – wash with like colors and dry in whichever way you would normally dry something.

If it’s delicate, put it in a mesh bag and wash – by itself or with like colors – on the most gentle cycle that your washer offers. Hang or lay flat to dry.

Preparing Fabric to dye:

Maybe you are checking in here because you have your own indigo dye and aren’t sure how to prepare your fabric before dyeing. Good idea! Just a quick reminder that indigo dyes natural fibers only. If you have something with a very small percentage of a synthetic – like under 10% – that’s probably fine.

There are a couple ways to prep fabric but one thing that indigo does NOT require, is a mordant. So…don’t do that. Feel free to google “mordant” for more info. Because I mostly dye with indigo, I don’t use mordants so I’m not the best person to ask about them.

For PFD (prepared for dyeing) fabric: Simply wash your fabric in your washing machine on the highest heat you think it can handle adding your regular detergent and Arm N’ Hammer Washing Soda. 

For wool or silk or regular (not PFD) fabric or thrifted clothes or regular clothes and, really, almost everything that isn’t PFD (some people would argue even PFD fabric should get this treatment but I think that’s overkill, please see the quote at the top of this page), a good scour will make your fabric more in the mood to be dyed. 

To scour fibers of any kind, bring a large pot of water to a boil then turn off the heat. Add a big squirt of Dawn Dish Soap and carefully add about a cup or so of Arm N Hammer Washing soda. The Washing Soda will increase the temperature of your water so it’s apt to boil over. I recommend adding it a little at a time.

Stir it up well and then add your fabric, opening it as you lower it in so more of the surface gets wet. Stir it every 15 to 20 minutes and leave it covered for at least an hour. Sometimes I just leave it overnight and let it cool. The water should be stinky and gross. If the water is dark brown, repeat the process. Otherwise, rinse your fabric well and you’re ready to rumble.

Please be careful not to felt wool!

If you normally use dryer sheets, DO NOT dry your prepped fabric in your dryer, just hang it to dry or don’t dry it at all. Drying it before dyeing isn’t needed and BOOM! you’ve cut down on your wait time. Get your hands in that vat!!!

Monday, August 5, 2013

Thinking Out Loud On The Blog

Kayak trip cancelled due to perfect weather.

The forecast called for rain and the trip required earlier than normal waking.  So when I did finally wake up and saw the forecast was wrong, the weather was perfect and we cancelled the trip for no reason, it was too late to get moving.  


Bummer.
But, looking on the positive side, I had some time to sit down and sew a bit.  
I finally finished that last quilt top square. 


Woohoo!


Oh yes, you have to suffer through at least one gratuitous close up.


That's how much fabric was left over.  Not much.  


Which is another bummer because I need more fabric to make the squares all fit together.  
WHY did I make those napkins when this fabric told me it wanted to be a quilt?!?!?!?!?

I do love my napkins, though. 


Anyhoo, my lack of indigo dyed linen led to me making a bunch of silly looking piles of fabric under my smallest square to try and find something that worked.  This one is dyed light blue with indigo but has a print on it which might be distracting.


Linen lavender remnant of a jacket.  But also thicker than the other linen in the quilt.  Hmm.


A linen/cotton blend skirt.  Beige.  


Olivey-brown linen pants.
  

Linen shirt.


Other pair of linen pants, grey.

Hmm.  I guess I'm just thinking out loud on the blog here.  
I often get a different view of something after posting it here.  
The extra fabric I pick will also show up here and there between squares to make them fit together.  I'll let you know what I pick.  Either I make a point of it all being blue or I have another color peeking out here and there.  

Win win, I'd say.  

Related Posts Plugin for WordPress, Blogger...